In today’s article, we will walk you through how to use img2img stable diffusion.
Nowadays text-to-image AI generation is very popular which has famous names like Midjourney, Leonardo AI, bluewillow, and many other AI generatives that generate outstanding and desired images in a few seconds by using simple prompts given by you.
You must be aware that all these text-to-image AI generative are mostly paid or work on the freemium model.
But stable diffusion is software that is open source and freely available, you can download & install stable diffusion on your Windows, we have given a step-by-step guide.
In this article, we will discuss how to use img2img stable diffusion feature and the various options available in it which can be customized according to our needs. Img2Img Stable Diffusion is a stunning tool that allows you to transform and enhance images in ways you might have never imagined.
Whether you are a professional or a dumb artist, let’s see how the img2img feature can convert your simple image into an outstanding image according to your imagination.
Credits: The screenshots used to understand the things in this tutorial post of “How to use Img2Img Stable Diffusion” are taken from the videos of @InciteAI and @sebastiankamph YouTube channels which are mentioned in the same post.
Let’s Dive into This,
What is Img2img Stable Diffusion Feature?
Img2img stable diffusion tool is a cutting-edge process that transforms your existing image into a new desired image while retaining the essential composition and structure of the original image.
In simple words, let us tell you if you have a raw image that you want to modify, “Just an example you have an image of a girl model whose hair you want to make blue then you can do it easily using this tool”.

This transformation is carried out by introducing changes, colors, or styles. The AI algorithm analyzes the input image and then applies modifications according to the settings you specify.
You’ll primarily use this img2img tool when you have an image (whether that image can be a photograph, a painting, or a sketch) and you want to modify it. To initiate the process, simply import your image into the image-to-image box with your desired prompt.
For a seamless experience, you can add both positive and negative prompts. These prompts help guide the AI model to understand your creative vision better.
Some Use Cases of Img2Img Stable Diffusion Tool
Before using the Img2Img tool, it is important to know what its usefulness is and how we can use it. Let’s explore practical scenarios where image-to-image generation can be a game-changer:
1. Artistic Transformations
Imagine starting with an image and enhancing it with unique artistic styles. Whether you want to change colors, add or modify details, or apply various artistic effects, image-to-image generation makes it possible. You can create one-of-a-kind pieces of art by experimenting with different denoising strengths and styles.
2. Upscaling Low-Resolution Images
Do you have low-resolution images that need a boost in quality? Image-to-image generation is your solution. By specifying a higher resolution, you can upscale your images while maintaining or even improving their overall visual quality. This is particularly useful when you need larger images for printing or high-definition displays.
3. Correcting and Enhancing Photos
Have you ever taken a photo and wished you could make it better? Image-to-image generation can help you correct and enhance photos by adjusting colors, removing imperfections, and fine-tuning details. This can be a valuable tool for photographers and photo enthusiasts.
It all depends on your creative mind, how you use it, and how much you can benefit from its possibilities. But these are some use cases that will give you some idea of how you can change your images according to your imagination.
Understanding Img2Img Stable Diffusion Tool Important Settings
Img2Img tool has many other tab features like Sketch, Inpaint, and Inpaint Sketch; we will talk about these important functions because with these functions you can customize your images.
Now, let’s explore some key settings within the Img2Img tab.
Denoising Strength (The Magic Ingredient for Img2Img Tab)

One of the most crucial settings in the Img2Img generation is the denoising strength. This setting determines how much the new image will resemble the original. It ranges from 0 (no change) to 1 (completely different). Striking the right balance between retaining the core features and introducing desired modifications is the key to success.
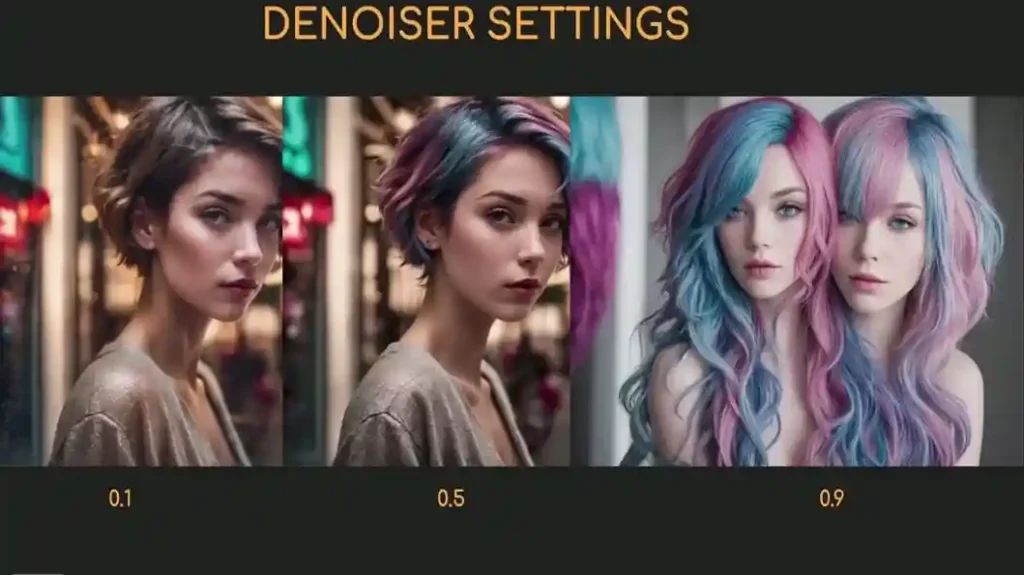
For example, setting the denoising strength to 0.6 is a popular choice when you want to retain much of the original composition while adding details. This results in an image that maintains its core elements but with significant enhancements.
Resize Mode: Tailoring Your Canvas

The Resize setting is important when you want the new image to have a different size and aspect ratio compared to the original. You have several options available:
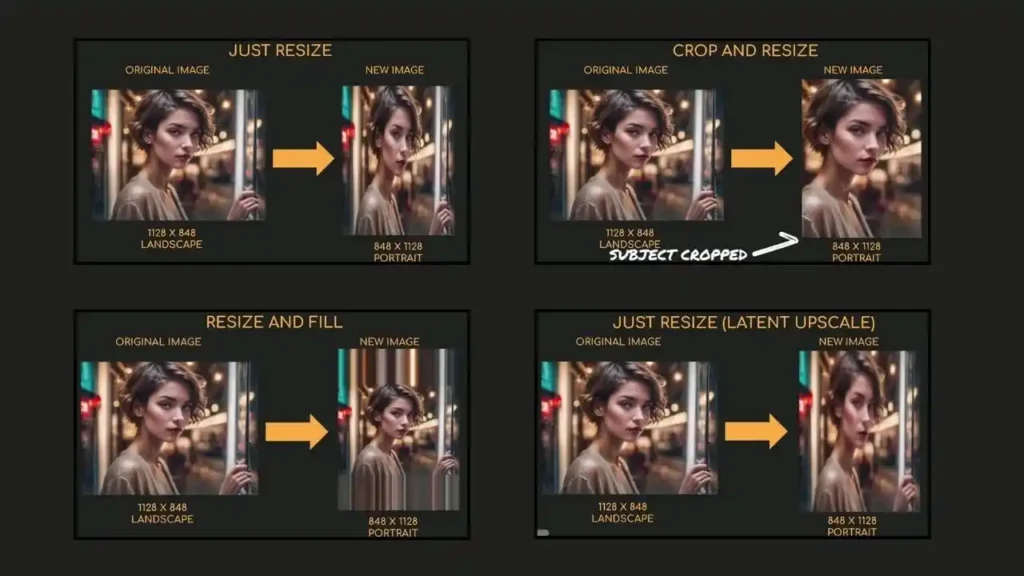
Just Resize: This option stretches or shrinks your original image to fit the new canvas size.
Crop and Resize: It preserves the aspect ratio of your original image and crops it to fit the new canvas.
Resize and Fill: This setting adapts the original image to the canvas while filling any blank spaces with colors from the input image.
| A Pro Tip: “Just resize” is suitable for most cases, while “Just resize latent upscale” is handy if you need to upscale the image as well. |
How to Use Img2Img Stable Diffusion Tool (Img2Img, Sketch, Inpainting, Inpaint Sketch, & Upscaling)
You can change any image according to your imagination. This tool is easy to use if you adjust the features as per how it works and rest you use it at your convenience; it depends on your creative mind and on the prompt given by you.
To take image-to-image generation to the next level, you can explore these advanced techniques, such as given below:
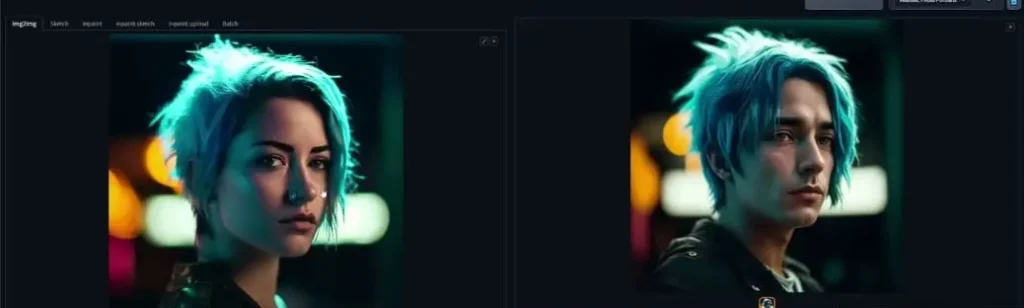
Generating with IMG2IMG Tool

To use the Img2Img tool, you can insert or upload any of your images in the image box. You can also transfer images from the text image tab by clicking on “Send to Image to Image” in the generation menu.
Now whatever image you want to customize, you have to give your prompt and you can change the denoising one by one and generate the result to see whether it matches your vision or not. Remember that the entire prompt, along with the image, influences the outcome.
Additionally, we’ll tick the “restore faces” option, retain the default resizing settings, and keep our dimensions unchanged. To add a touch of finesse to our output, we’ll set the denoising strength to 0.7 Simply you will practice all these things and you will be perfect. You will see the results by changing the settings yourself and will get your result based on denoising and prompts.
Sketch Tool: Draw anything and Replicate it into the Realism
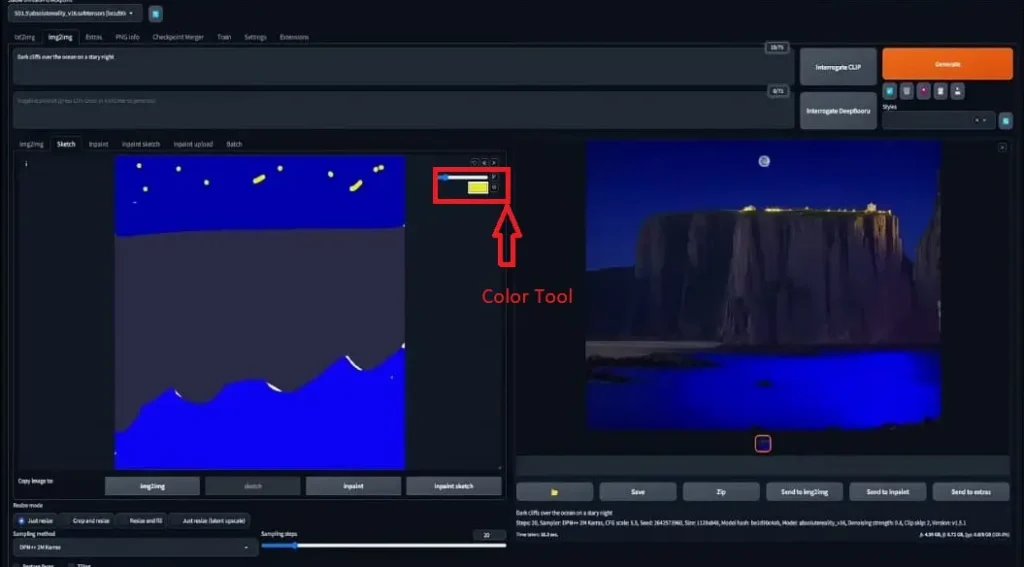
If you are not a very good artist then don’t worry it will convert your bad drawing into a realistic image.
Sketch tool is an amazing experimental tool with the help of which we can draw anything on the canvas according to our imagination with color compositions and desired prompt and can generate realistic images using img2img stable diffusion.
- Simply upload a white or black image into your canvas so that it will act as your background.
- Then you draw something with colors, suppose you have drawn a painting.
- Generate usage by adjusting the settings as per your requirement.
By dropping a white or black mask into the provided canvas, you can easily sketch out your ideas. This allows you to not only visualize your concepts but also add a personal touch to your work.
| Pro Tip: You can add any elements to your images with the help of color tool and prompt. Suppose for example you have a boy image in which you want to wear glasses, with the help of this tool, you can draw glasses with the simple color tool and give the prompt such as “man with yellow glasses” and it will generate as you want” |

Inpainting: Target Edits

Sometimes, you might love the composition of your image but wish to alter specific details. In such cases, “In Paint” comes to your rescue.
It allows you to paint over the parts of the image you want to change. This feature is especially useful when you wish to retain the overall composition while making minor adjustments. This technique is especially useful when you want to focus on enhancing specific parts of an image while leaving the rest untouched.
It has its own settings in Inpainting, which are important to know if you want to use it properly.
Mask Blur: This setting controls the amount of blurring applied around your painted mask, influencing the softness or sharpness of the edges.
Mask Mode: You get 2 options here, one is “Inpaint Masked” which you can use when you want to make changes only in the painted areas and the other one is “Inpaint Not Masked” which can be used to make a slight change in the whole images.
Masked Content: In-Paint offers the “Masked Content” setting, which plays a pivotal role in generating the new image part. The “Fill” option uses the impainted area as a basis for generating new content. On the other hand, the “Original” setting keeps the base image unaltered while generating a new image. You can also opt for “Latent Noise” if you desire a completely different result or “Late Nothing” to blend colors from surrounding pixels.
| Inpaint Area: It’s important to differentiate between “In-Paint Area” and “Mask Mode.” While “Mask Mode” determines what parts of the image are changed, “In-Paint Area” influences the inspiration source for the in-paint generation. Select “Whole Picture” if you want your painted area to seamlessly blend into the rest of the image. Alternatively, choose “Only Masked” to treat the masked area in isolation. You can also adjust the padding size to control the number of neighboring pixels used for inspiration. |
Inpaint Sketch: Added Elements with Sketch
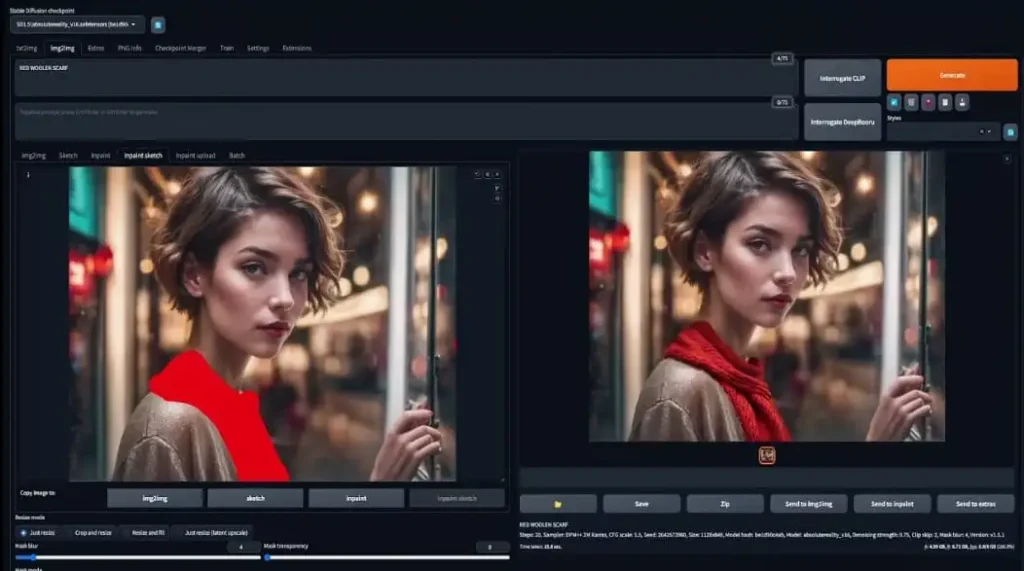
InPaint Sketch is a versatile digital tool that allows artists to manipulate images and transform them into unique and eye-catching pieces.
If you struggle to translate your creative ideas into a digital canvas, the “In Paint Sketch” tab is your artistic playground. You can effortlessly sketch out your vision by using a white or black mask and a paintbrush. Highlight the details you want to emphasize, add color, and pair it with your prompt to transform your sketch into a remarkable piece of art.
| Please Don’t Confuse in Sketch Tool and Inpaint Tool “Sketch tool” allows you to change the overall image but in “Inpaint tool” you can mask a particular area and change the same particular meshed area with the help of color and prompt. |
Upscaling
Upscaling involves increasing the resolution of your images. This can be particularly handy when you have low-resolution images that need to be turned into high-resolution versions. By using the right denoising strength and settings, you can upscale your images while preserving their core features.
Watch This!
Conclusion (Our Final Words)
In this article we have explained everything in detail, if you have patience and you can explore this article then you can easily use the Img2Img stable diffusion tool productively.
I have talked in detail about Img2Img, sketch tool, Inpaint, Inpaint sketch, and upscaling and explained each point and setting.
We have also mentioned what is the difference between the sketch tool and the Inpaint tool and some settings of Inpaint have also been discovered in detail so that you can use these settings properly.
Img2Img generation often involves an iterative process. If you’re not getting the exact results you want, don’t worry. You can refine your images step by step, adjusting the denoising strength and other settings as needed. This iterative approach allows you to fine-tune your images until you achieve your desired outcome.
If you want to do Stable Diffusion online >> https://huggingface.co/spaces/stabilityai/stable-diffusion
We hope you liked this guide and that it helped you learn how to use Img2Img stable diffusion tool. If you get value please subscribe to our blog by submitting your email ID. We will update you about the tools related to AI and provide valuable information.
AI moving too fast? Get the email to future proof yourself.