
Hey Everyone, If you are confused about what is Stable Diffusion or how to install stable diffusion on your Windows PC then you are at the right place.
Today, in this post we will learn how you can install Stable Diffusion on your computer or Windows. With Stable Diffusion, You can give input of any text or prompt (basically your words) in it and it generates images for you based on your given text using AI. The results generated by this are actually very stunning.
There are many different companies in the market that are copy out this AI technology But the reason behind liking so much Stable Diffusion is that it is publicly available to all and it is free to use.
You can install Stable Diffusion on your computer as long as you have a decent graphics card, and you also get full rights to all of the images that are generated.
Let’s check this out.
Also Read: How to use img2img stable diffusion (Tutorial Guide Step-By-Step)
Stable Diffusion on the Web
Before installing Stable Diffusion, I would like to tell you one thing you can try it on the web if you want to experiment and want to know how it works.
By click on the link, you can try out this >>> https://huggingface.co/spaces/stabilityai/stable-diffusion
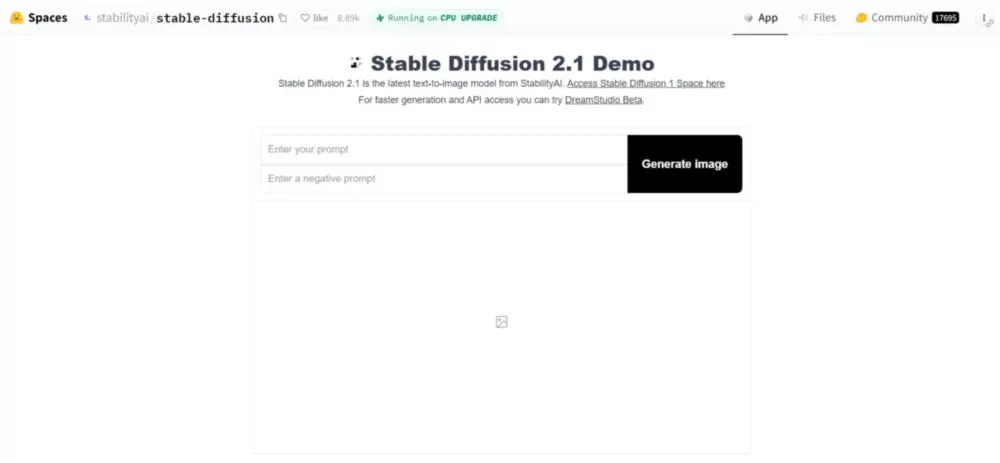
By visiting this website, you give any prompt here and it will generate 4 different images for you according to your given text.
So when you can use it on the web, why would you want to install it?
Well, when you manually install Stable Diffusion on your windows, you get more parameters or settings for adjustments, and you can also output far more images.
System Requirement to Install Stable Diffusion in your Windows PC
First, make sure that you have Windows 10/11 or Linux operating system
Second, you have to make sure that you have a dedicated Nvidia graphics card but we know that there will be many people who do not have a dedicated graphics card, so,
Don’t worry; you can also use it with your CPU-oriented graphics card but you will get very slow output.
Well, to check if you have a discrete GPU or graphics card available or not, On Windows, press control + shift + escape.

By doing this, your task manager will open, and after that, you go to the performance. Here if you see NVIDIA in this list then that means that you have a discrete GPU or graphics card, so that’s good news.
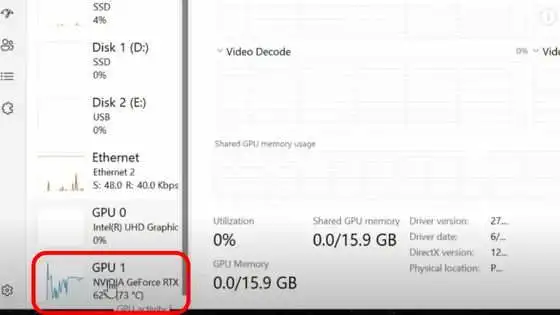
Right here, you’ll also want to verify that you have at least 4 gigabytes of dedicated GPU memory.
Next, you’ll also want to make sure that you have at least 10 gigabytes of free hard drive space. If you have those, then we’re ready to move on to the prerequisites that we need to install.
Follow the 5 Steps To Install stable Diffusion on Windows:
By following these 5 steps, you can easily install Stable Diffusion on your Windows PC. You will not face any errors just follow these steps,
Here is the overview of the steps:
- Install Git
- Then Install Python
- Download stable diffusion
- Choose a stable diffusion model
- Give some CMD and the final step
To use Stable Diffusion, we need to get two different prerequisites. The first one is called Git and the second one is Python.
What is Git?
Git Basically is a source control management system that coordinates the source code of software development with computer files. We will use Git to Install the stable diffusion and also to update it.
Why only Python and why not any language?
As we know Python is a programming language. Stable Diffusion is built from Python language so we will use it.
#1. Step: Install Git
You can download the Git simply by clicking on the given link: https://git-scm.com/download/win
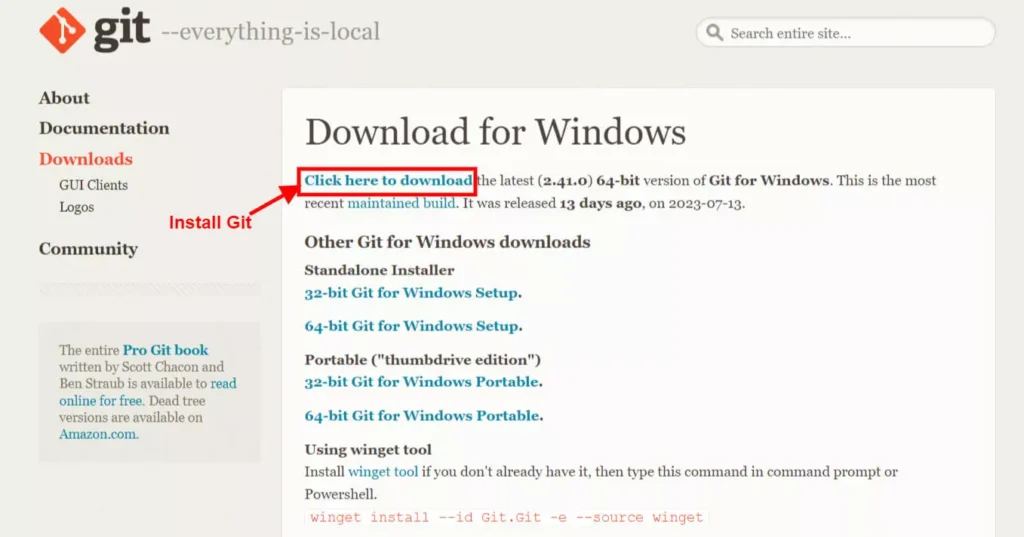
After downloading, click on the file and install it. Every time you ask for permission during installation, you will allow all the permissions and stick to defaults and simply It will be installed in your Windows.

#2. Step: Install Python
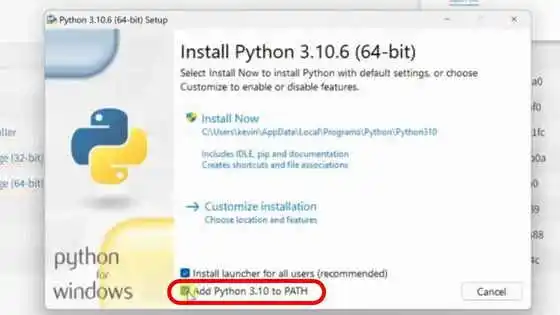
Just click on this link to download >>> https://www.python.org/downloads/release/python-3106/
Scroll down and Download the “Windows Installer (64 bit)” it is also recommended.
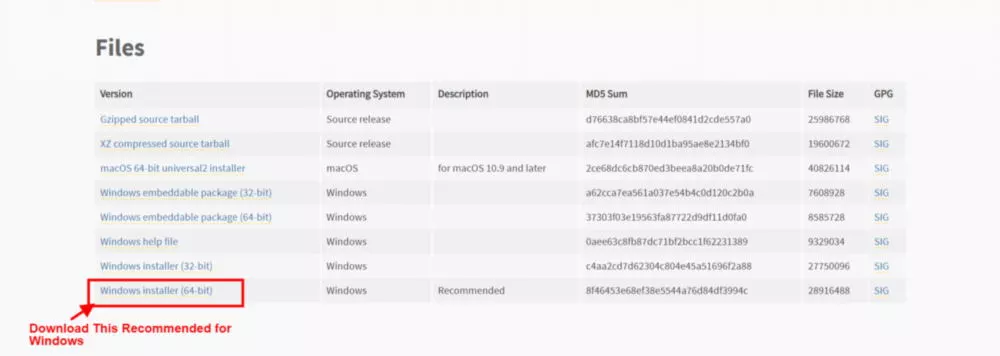
After the file is downloaded, you have to install it and make sure that you click on the checkbox “Add Python to Path”.
#3. Step: Download and install Stable Diffusion
The method of installing stable diffusion is very simple and easy. We install a fork in our Windows which is known as “webui”. WebUI is a popular fork (a new repository that shares code and visibility settings with the original “upstream” repository.) of stable Diffusion, whose user interface is very easy and simple, which makes it easy to interact with the user.
Open your file explorer and create a folder named “Stable Diffusion” where you want to install Stable Diffusion. i.e.
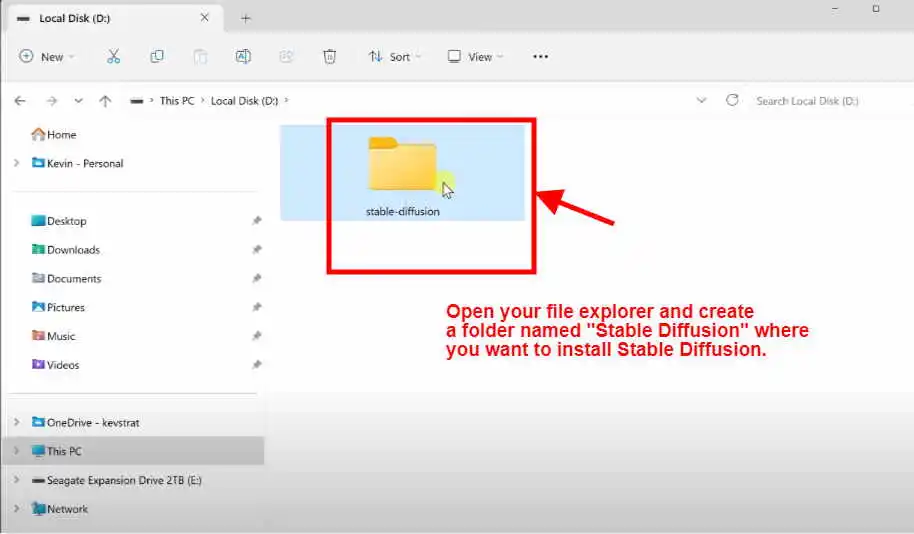
Open Your File Explorer > Local D or anywhere you want > click on the right and create a folder (Stable diffusion)
Then click into the folder that you just created and type CMD in the above address bar. Well, doing so will open your command prompt,

After the command prompt is open, type “Git Clone” in it and paste the repository URL after giving a space. Like (git clone https://github.com/AUTOMATIC1111/stable-diffusion-webui)

Then Enter
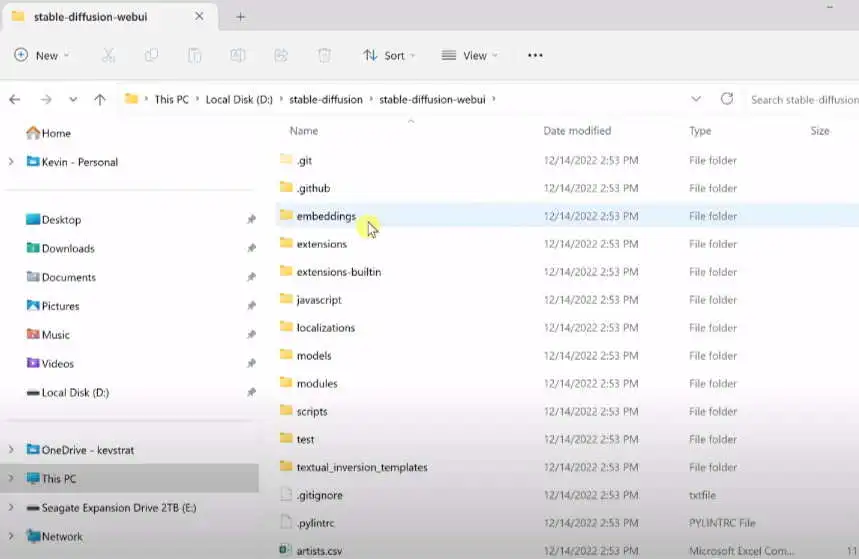
After entering, it will take some time and clone all the files in that repository. Once you go back into the file explorer and you will see that a new folder named “Stable Diffusion Web UI” is presented.
You can open the folder (Stable Diffusion Web UI) and will see that all repository files are cloned there.
Now is done this work and go to the next step.
#4. Step: Download the Stable Diffusion Model
Hope you have installed Git, Python, and Stable Diffusion Web UI by following the steps, then let’s go to the next step in which we will install the Stable Diffusion model.
Note: There are many models of stable diffusion, and each model generates different results with the same prompts. Different data sets are used in each model which is why each model generates its own different variant. So some models generate better anime images and some generate better portrait illustrations. To find out more about models in stable diffusion check this article.> https://stable-diffusion-art.com/models/
You can Download the Stable Diffusion Model by clicking on this link > https://huggingface.co/runwayml/stable-diffusion-v1-5
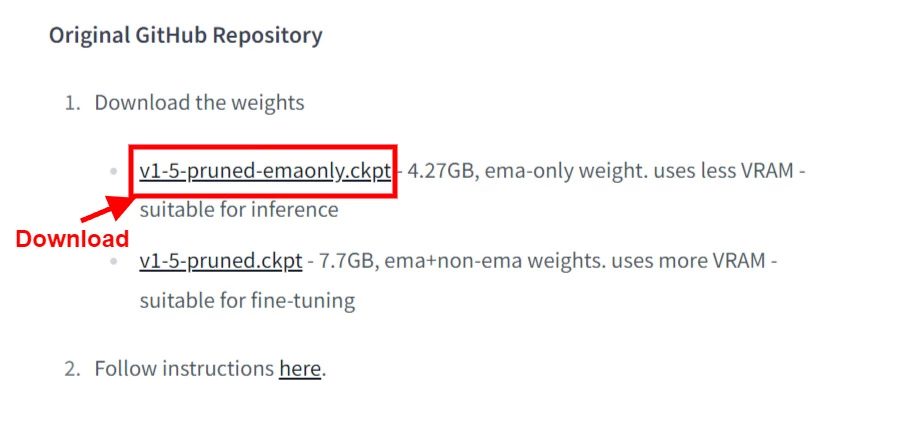
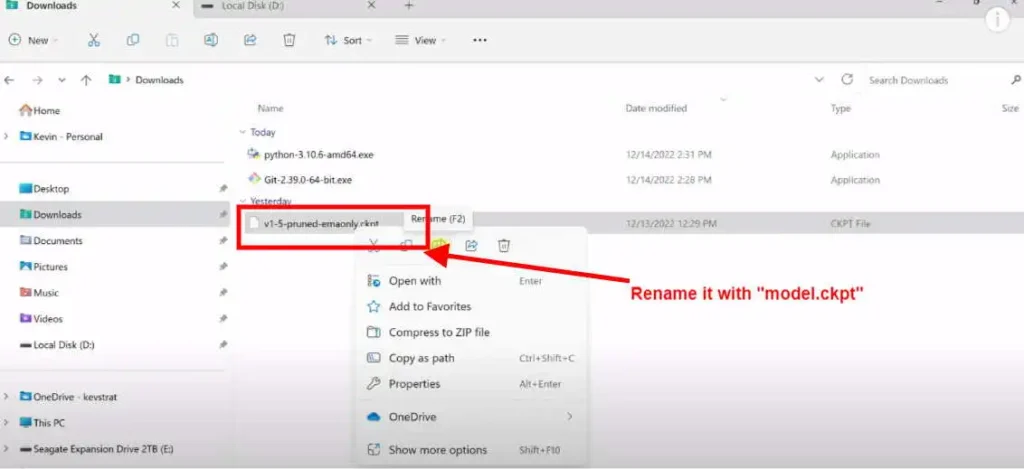
After downloading the stable diffusion model, rename it to model.ckpt.
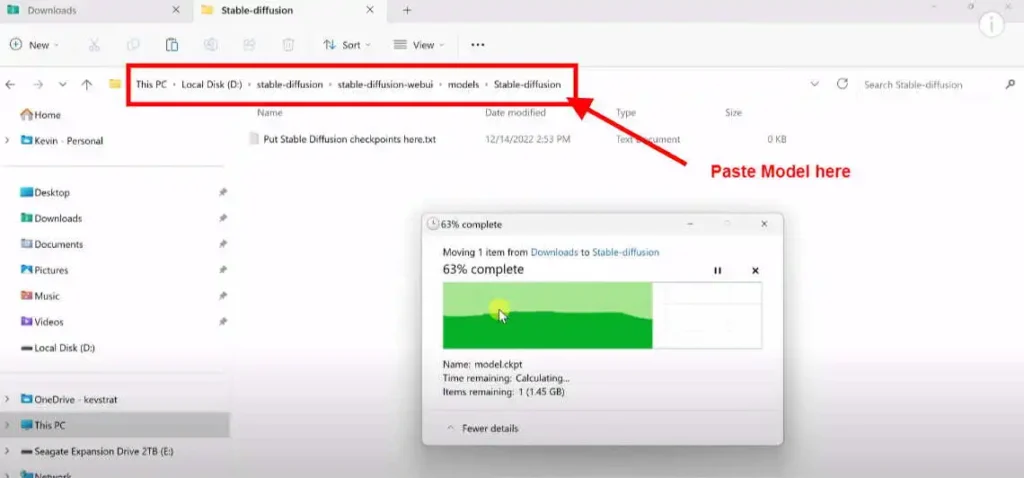
Copy the file, and navigate to the Stable Diffusion folder you created earlier. In the folder navigate to Stable Diffusion Web UI » models » stable-diffusion and paste your file there.
#5. Step: Stable Diffusion Launch
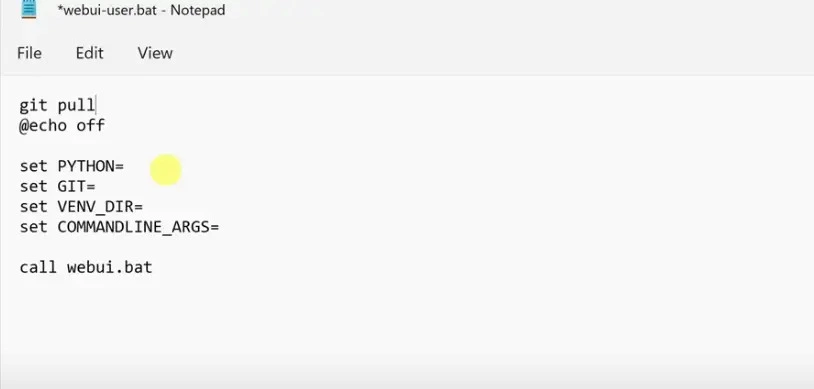
Now you go to the Stable-Diffusion-WebUI folder and find “webui-user.bat.” directory and open it in Notepad to edit.
And at the top type “git pull” and save the file,
(Note: By doing this optimization we will always be able to use the latest version of Stable Diffusions and we don’t need to do anything else.)
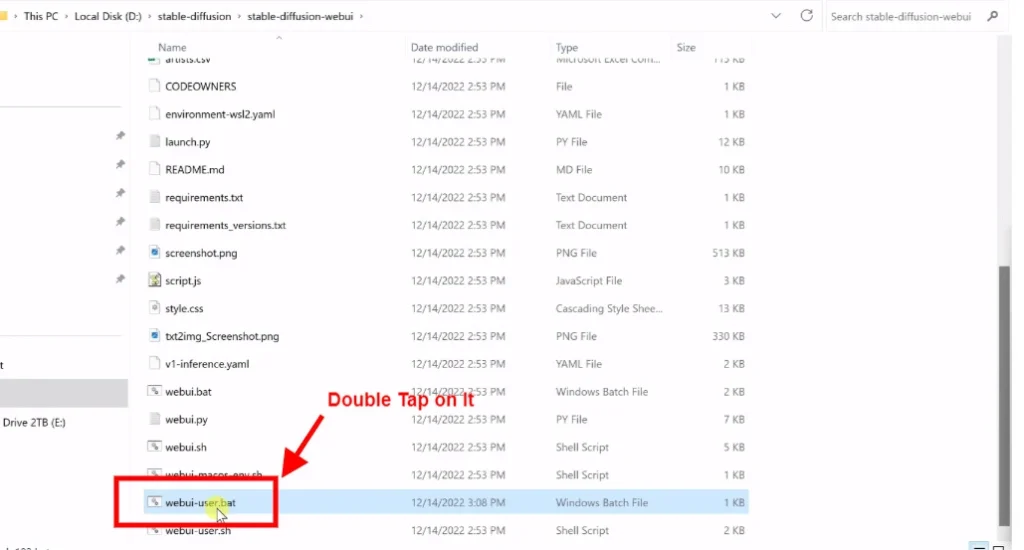
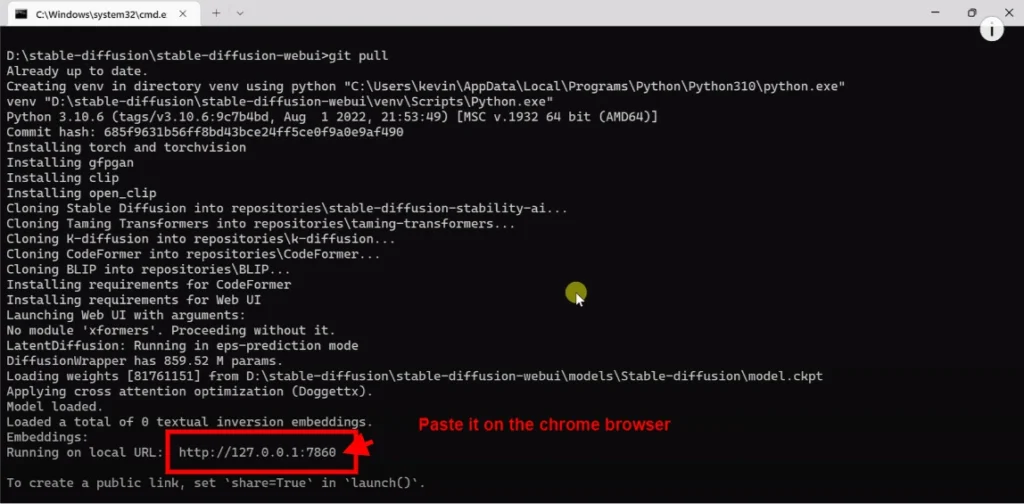
Now Double click on the “webui-user.bat.” directory and so on it will run and take some time.
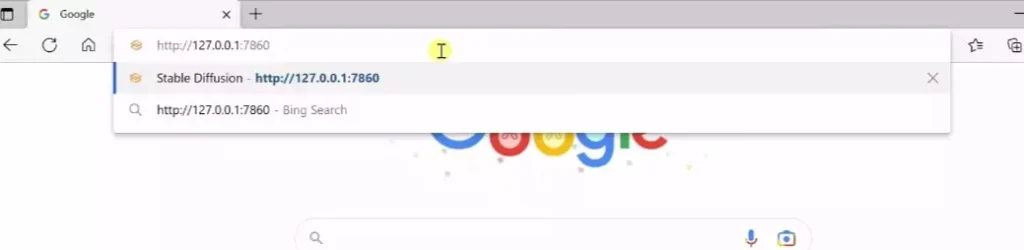
After a little bit of time, you will see a URL: http: //127.0.0.1.7860 Paste this URL in the address bar of the Chrome browser and then enter,
After that it’s done, you can access your stable diffusion.
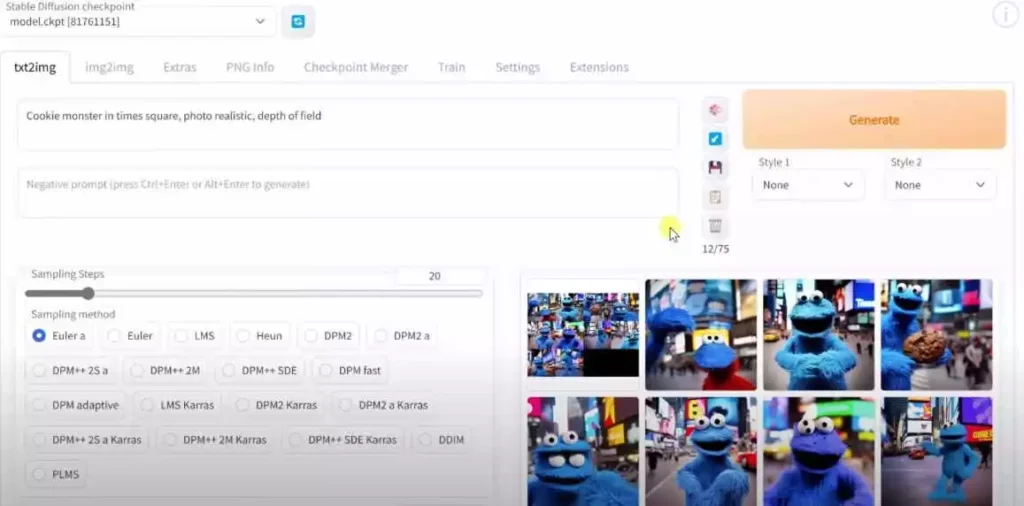
Now type the prompts according to you and click on generate and verify that your stable diffusion is working properly.
To shut down your stable diffusion webui, close the command prompt, and if you want to do it again, you can double-click on the “webui-user.bat.” directory.
Well, congrats, your stable Diffusion is downloaded & installed in your Windows, and you can use it. If you are a beginner then you can check out these awesome Stable Diffusion posts of ours.
Any Confusion? Watch This Video
Conclusion
We hope that with the help of this post on “How To Install Stable Diffusion”, you will be able to easily install Stable Diffusion on your Windows.
You can install Stable Diffusion by following our mentioned steps and if you face any problems then you can contact us. Please subscribe to our blog so that you can stay updated on AI tools and develop yourself.
Okay, thanks and Be Productive!
Frequently Asked Questions: How To Install Stable Diffusion
Can I install stable Diffusion on my Windows without a dedicated GPU?
Yes, of course, you can but you will have a lot of problems in terms of speed.
What Are Stable Diffusion Models?
There are different models in stable diffusion, basically, models are data structures and each model generates different results. Some models are for animation and some are for illustrations. The work and results of each model are different.
AI moving too fast? Get the email to future proof yourself.